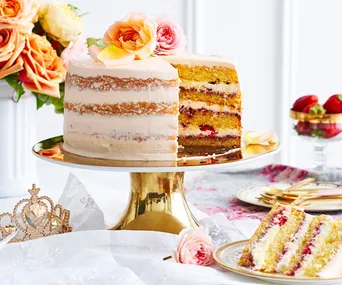
This personalised blackboard cake will certainly be one to remember! Creative, nostalgic and fun, it’s perfect for birthdays, graduations, teacher appreciation and more. This retro classic is from our Children’s Birthday Cake Book.
Ingredients
Method
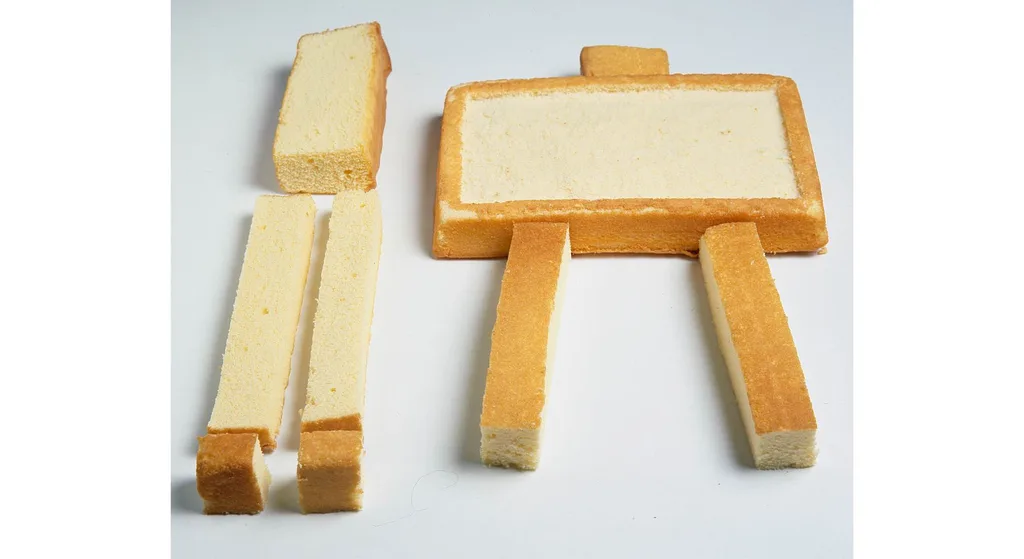
Make cakes according to directions on packet, pour half into greased 28cm x 18cm (11in x 7in) lamington tin, pour other half into greased 23cm x 12cm (9in x 5in) loaf tin, bake in moderate oven 30 minutes for lamington tin cake, 50 minutes for loaf or until cooked when tested. Turn on to wire racks to cool.
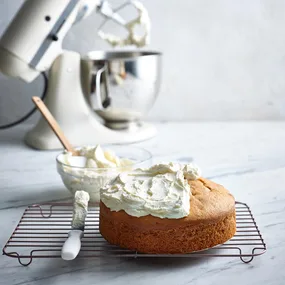
VIENNA CREAM ICING
Have butter and milk at room temperature, place butter in small bowl of electric mixer, beat until butter is as white as possible, gradually add about half the sifted icing sugar, beating constantly, add milk gradually, then gradually beat in the remaining icing sugar; mixture should be smooth and easy to spread with a spatula.
Cut shallow recess about 3mm (1⁄8in) deep 1cm (½in) in from edge of lamington tin cake, as shown, to make frame and recess of blackboard. Cut two 4cm x 18cm (1½in x 7in) strips from loaf cake for legs, cut 6cm x 4cm (2½in x 1½in) rectangle for top, assemble, as shown, on prepared board.
Tint one third cup Vienna Cream with a few drops red food colouring to make pink Vienna Cream. Combine coffee powder with water, add to remaining Vienna Cream, mix well. Spread legs and frame with coffee Vienna Cream. Use liquorice for bar which joins legs of blackboard, decorate frame with chocolate liquorice bullets.
Put chopped chocolate and Copha in top of double saucepan, stir over simmering water until melted, cool; pour chocolate mixture into recess of blackboard, spread evenly, allow to set.
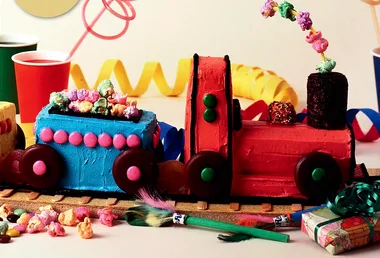
Fill small paper bag (see tip below) with pink Vienna Cream, pipe greeting on blackboard. Pieces of coloured musk sticks represent chalks, rectangular sweet represents duster.
Which lollies do I need to decorate this blackboard cake?
We used liquorice, chocolate liquorice bullets, assorted coloured musk sticks and a large marshmallow or similar large rectangular sweets.
For a fun party idea, you could use icing pens so guests can add their own messages to the cake before cutting it.
Using a cake board
To make handling the blackboard cake easier, assemble it on a covered board. Choose a paper with a grease-resistant surface or aluminium foil to prevent the Vienna Cream’s butter from being absorbed.
Alternatively, a covered breadboard or chopping board can be used. The board should be approximately 5cm larger than the cake on all sides. Wooden or heavy cardboard cake boards are also available from cake decorating suppliers and some cake shops.
How to cover a square board
Place the paper face down on a flat surface. Position the board on top, then trace around it with a pencil. Remove the board and cut out a square that is 2.5cm larger than the traced outline.
Using sharp scissors, trim a small piece from each corner, stopping 3mm before reaching the board’s edge, to prevent bulky corners.
Place the board back in position, fold the paper over the edges, and secure it with tape.

How to make a paper piping bag to ‘write’ on the blackboard cake
Cut out a square of baking paper; it must have straight sides and each side must be of the same length to give a good-shaped bag for piping.
Fold diagonally, cut into two triangles. Hold the apex of the triangle in your left hand with the point of the apex towards you, take the right hand point in your right hand, curl point of paper over until you have this point and the point of the apex touching; hold these two points with right hand.
With left hand and left point of paper, wrap the paper over the top hand half-way under the cone so this point meets the other two points exactly. (Of course, if you’re left-handed, reverse the procedure.) If the triangle is evenly cut, the three points will all touch and the cone shape will not have a hole at the tip.
Secure joins of bag, inside and out, with a piece of tape. Always place the icing or cream used for piping in the bag first, then snip a tiny hole in the top of the bag, gently push icing down, fold over ends to prevent icing coming out top, enlarge hole with scissors to the required size.